How To Safely Store Your Data on the Cloud
Posted 5 years ago by Christian Krutsche
For more than a decade, the cloud, cloud computing, and cloud storage have been some of the hottest and enduring buzzwords in our industry. While most companies understand the benefits of moving their servers to the cloud and have made the leap, there are still many holdouts. The reason for this is simple; they do not trust cloud providers to protect their data. Fortunately, there is a safe and affordable solution—data encryption.
Data encryption uses code to protect the confidentiality of data, making it unreadable by a computer or a person. In order to read the data, it needs to be decrypted using an algorithm-generated key. Many big names in our industry, including Amazon, Microsoft, Oracle, and IBM, offer cloud computing services that include data encryption. In this article, we’ll show you how to encrypt and safely store your data with one of the big names, Google, in Google Cloud Platform (GCP).
Overview of Data Encryption
Data is commonly encrypted on either the client side or the server side. Client-side encryption is the most secure option. With this option, you encrypt your data before sending it to your cloud storage provider. The downside to this approach is that it requires a great deal of computing power to encrypt the data before it can be sent. If you move large amounts of files frequently, it puts considerable strain on your CPU. Furthermore, if you are entrusted with managing your keys and somehow lose them, you lose all access to your data.
The second option is server-side encryption. With server-side encryption, information is encrypted after it is uploaded to the cloud server. We recommend that you always use HTTPS to ensure a secure transfer. GCP’s default encryption scheme is to always encrypt your data on the server side before it is written to disk.
Key Types
Here are the different types of encryption keys you might use to encrypt your data while using server-side encryption provided by GCP:
Google-managed encryption keys: This is the default key behavior. Google automatically encrypts data for you and also manages the encryption keys, so you don’t need to encrypt the data yourself.
Customer-managed encryption keys: This is similar to how encryption keys are managed by Google. You create service accounts for encryption and decryption, which gives you more control around data access. The downside to this is that the keys are stored at Google and not locally. You can read more about the customer-managed keys in the documentation here. Bear in mind that this option comes with restrictions, but they will most likely not affect you.
Customer-supplied encryption keys: We think this is the most interesting and viable option. As the name suggests, you supply your own keys. When you upload data, you also include the encryption key to encrypt the file. After encryption is completed, Google purges the key from its servers, so they cannot decrypt the data.
We think customer-supplied keys offer a good balance between performance and security. We like this option because you don’t need to do the encryption/decryption on your computer. While modern CPUs have fast hardware acceleration for data encryption, Google will do this for you, easing the CPU strain on your servers, and saving you the time it would take to implement encryption on your own.
Important: Make sure you manage your keys properly, as they are needed to retrieve or encrypt data. You can’t do either of these things if you lose your keys.
Using Customer-Supplied Encryption Keys
In this section, we will set up keys and implement them using the REST API. Google provides a utility called gsutil to simplify this process. Note that Google uses symmetric encryption, which uses the same key for encryption and decryption. If you are interested in asymmetric encryption, check out the Google Cloud docs.
Generate a random encryption key/Random encryption key generator
We need to generate an AES 256-compatible encryption key and hash. You can use one of the following code examples to do this.
Disclaimer: This is just an example code which can be used for the purpose of the testing.
Python
import os
import hashlib
import base64
key = os.urandom(32)
base_key = base64.b64encode(key)
base_hash = base64.b64encode(hashlib.sha256(key).digest())
print('Encryption key: {}’.format(base_key))
print(‘SHA256: {}'.format(base_hash))
Javascript
const crypto = require('crypto');
const key = crypto.randomBytes(32);
const base_key = key.toString('base64');
const base_hash = crypto.createHash('sha256').update(key).digest('base64');
console.log('Encryption key: '+ base_key + '\nSHA256 hash of encryption key: ' + base_hash);
Bash
export KEY_BASE=$(openssl rand -base64 32)
export BASE_SHA=$(echo -n "$KEY_BASE" | base64 -d | openssl dgst -sha256 -binary | base64)
echo Encryption key: $KEY_BASE
echo SHA256: $BASE_SHA
Using GSutil
Next, we will set up a Google cloud project, create a bucket, and generate an encryption key:
- Download and install GC SDK.
- From the command-line (terminal), run gcloud init.
- Authorize yourself in the browser with your account.
- Set up your encryption key:
-
- Bash users:
-
-
sed -i '/#encryption_key=/c\encryption_key=[ENCRYPTION_KEY]' ~/.boto
-
- Windows users:
-
- Open .boto in your home (profile) folder, and find the line with #encryption_key=
- Paste your encryption key and remove the pound sign (#).
Now you are ready to use basic command for data transfer called gsutil cp. Gsutil cp is similar to the Bash basic cp command. You can copy more files or folders with equal syntax (-r (recursive option for copying whole folder) or * for selecting more files). Copy your files from/to your computer with simple command in your command-line:
gsutil cp source target, where source and target is the path in your computer or the Google cloud bucket (e.g. gs://name-of-bucket/)
For example, gsutil cp encryptedFile.png gs://my-own-bucket/ will copy the encryptedFile.png file from the actual folder to the root of your bucket.
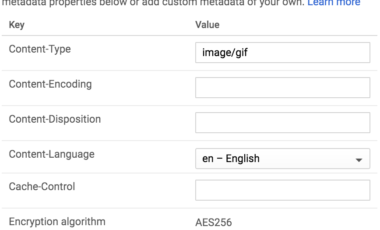
If you check your GC console, you’ll see that you can’t download your file or view it, even though you performed the upload. The only way you can download and view your file is to do so with an encryption key. The config file must contain same encryption key as the one used to upload (and encrypt) this file. If a bad encryption key is used, gsutil will respond with a message like this:
Failure: Missing decryption key with SHA256 hash r3nZgRFeFZv5jT9X49YX//Ly+WAdTFMuh9MoHGoJiiI=. No decryption key matches object gs://my-own-bucket/encryptedFile.png.
Using JSON API
We recommend using JSON API to implement your solution. If you only use GCP for backup storage, you can easily do this with gsutil.
We need to get an access_token to authorize your requests. While the recommended way to do this is to acquire it from OpenID Connect, we took the easy route and obtained an access_token from the GC SDK. You can get it by executing the gcloud auth print-access-token command in the command-line (terminal). Note that this token is temporary and will expire after 60 minutes.
Replace the variables that follow with generated keys, an authorization token, and a file.
Download a file:
curl -X GET -H 'Authorization: Bearer [ACCESS_TOKEN]'\
 -H 'x-goog-encryption-algorithm: AES256'\
 -H 'x-goog-encryption-key: [ENCRYPTION_KEY]'\
 -H 'x-goog-encryption-key-sha256: [HASH_OF_ENCRYPTION_KEY]'\
 --output [FILE_NAME].png\
'https://www.googleapis.com/storage/v1/b/[YOUR_BUCKET_NAME]/o/[FILE_TO_DOWNLOAD]?alt=media'
Upload a file:
curl -X POST -H 'Authorization: Bearer [ACCESS_TOKEN]'\
 -H 'x-goog-encryption-algorithm: AES256'\
 -H 'x-goog-encryption-key: [ENCRYPTION_KEY]'\
 -H 'x-goog-encryption-key-sha256: [HASH_OF_ENCRYPTION_KEY]'\
 -H 'Content-Type: [CONTENT_TYPE]'\
 --upload-file [FILE_TO_UPLOAD]\
'https://www.googleapis.com/upload/storage/v1/b/[YOUR_BUCKET_NAME]/o?uploadType=media&name=[FILE_NAME]'
Examples:
curl -X POST -H 'Authorization: Bearer ya29.GlzCBhDc9qkVyY4S85cHlJyF4GX-11zXJPu6ojiq6k6Z2a4VEcT6BpAbm2hh2YzuvBr2u4-9KY2Yd1PHUjSl8eMN66mE8cZ-Zuz0SKAy1hK8B902LS9EuenL8LtaPQ'\
 -H 'x-goog-encryption-algorithm: AES256'\
 -H 'x-goog-encryption-key: 9YDhAiqA9WU74VLjSK6GDSbrgjB2E06QXaGIxRfrlMA='\
 -H 'x-goog-encryption-key-sha256: r3nZgRFeFZv5jT9X49YX//Ly+WAdTFMuh9MoHGoJiiI='\
 -H 'Content-Type: media/png'\
 --upload-file ‘encrypted image.png’\
'https://www.googleapis.com/upload/storage/v1/b/my_bucket/o?uploadType=media&name=encrypted%20image.png'
Conclusion
If you have data, that you can’t afford to lose, GCP is an interesting and viable option. You can easily store the data in multiple data centers with a simple click. When you encrypt your data, you can rest assured that only you can read it. GCP can also be good for your budget, as Google creates encryption modules for you and implements the API, which also saves development time and resources.


